Before you start
You’ll need:- A funded wallet with at least 1,000 lamports of the deposit token (used as the bootstrapping deposit at creation).
- The mint address of the deposit token (e.g.
EPjFWdd5AufqSSqeM2qN1xzybapC8G4wEGGkZwyTDt1vfor USDC). - Decisions on: vault name, receipt-token ticker suffix, fee structure, operational parameters.
Choose your interface
- UI
- SDK
- CLI
Create via kamino.com/curators/vaults
Configure required parameters
Set the vault name, deposit token, receipt token name and ticker suffix.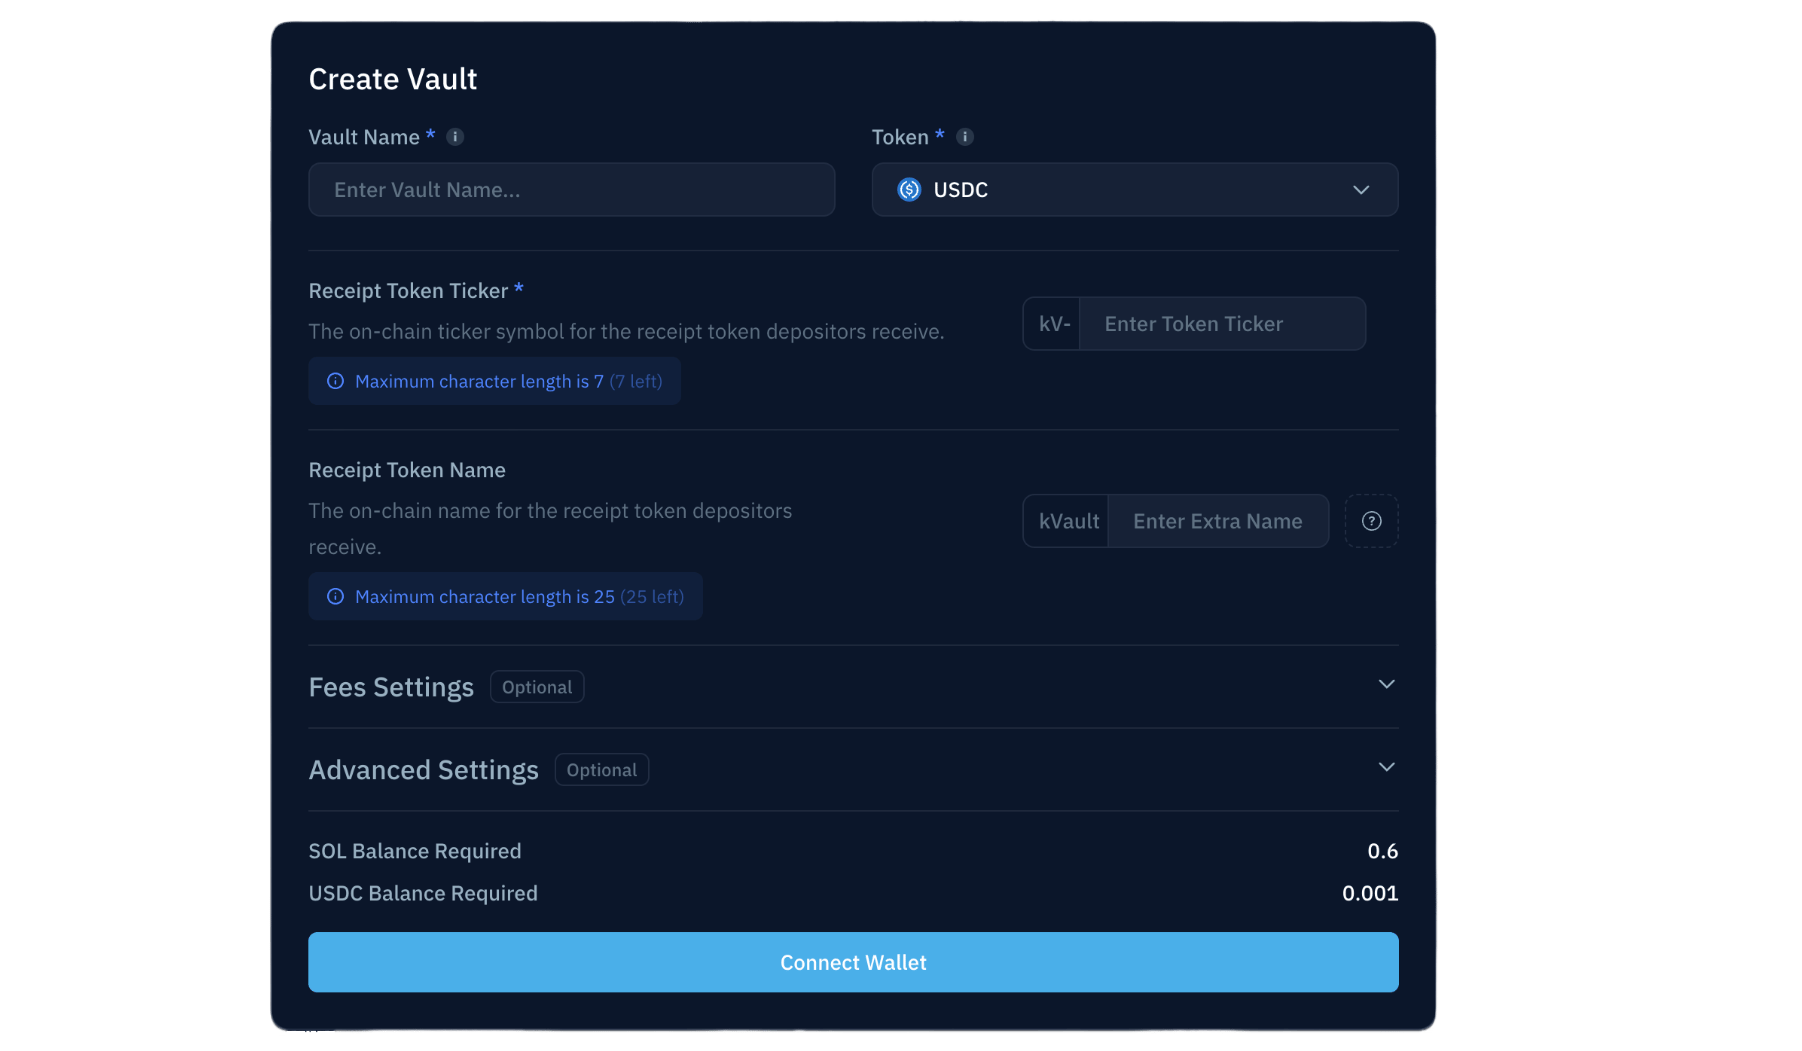
| Parameter | Notes |
|---|---|
| Vault Name | Max 40 characters; editable post-creation |
| Deposit Token | Immutable; determines available reserves for allocation |
| Receipt Token Ticker | Format kv[SYMBOL]-[SUFFIX]; the prefix is immutable, the suffix is editable post-creation |
| Receipt Token Name | Format kVault [SUFFIX] [NAME]; max 32 chars total |
Set fees
Configure performance fee and AUM fee. Both default to 0% and are editable post-creation. See Yield & fees for the model.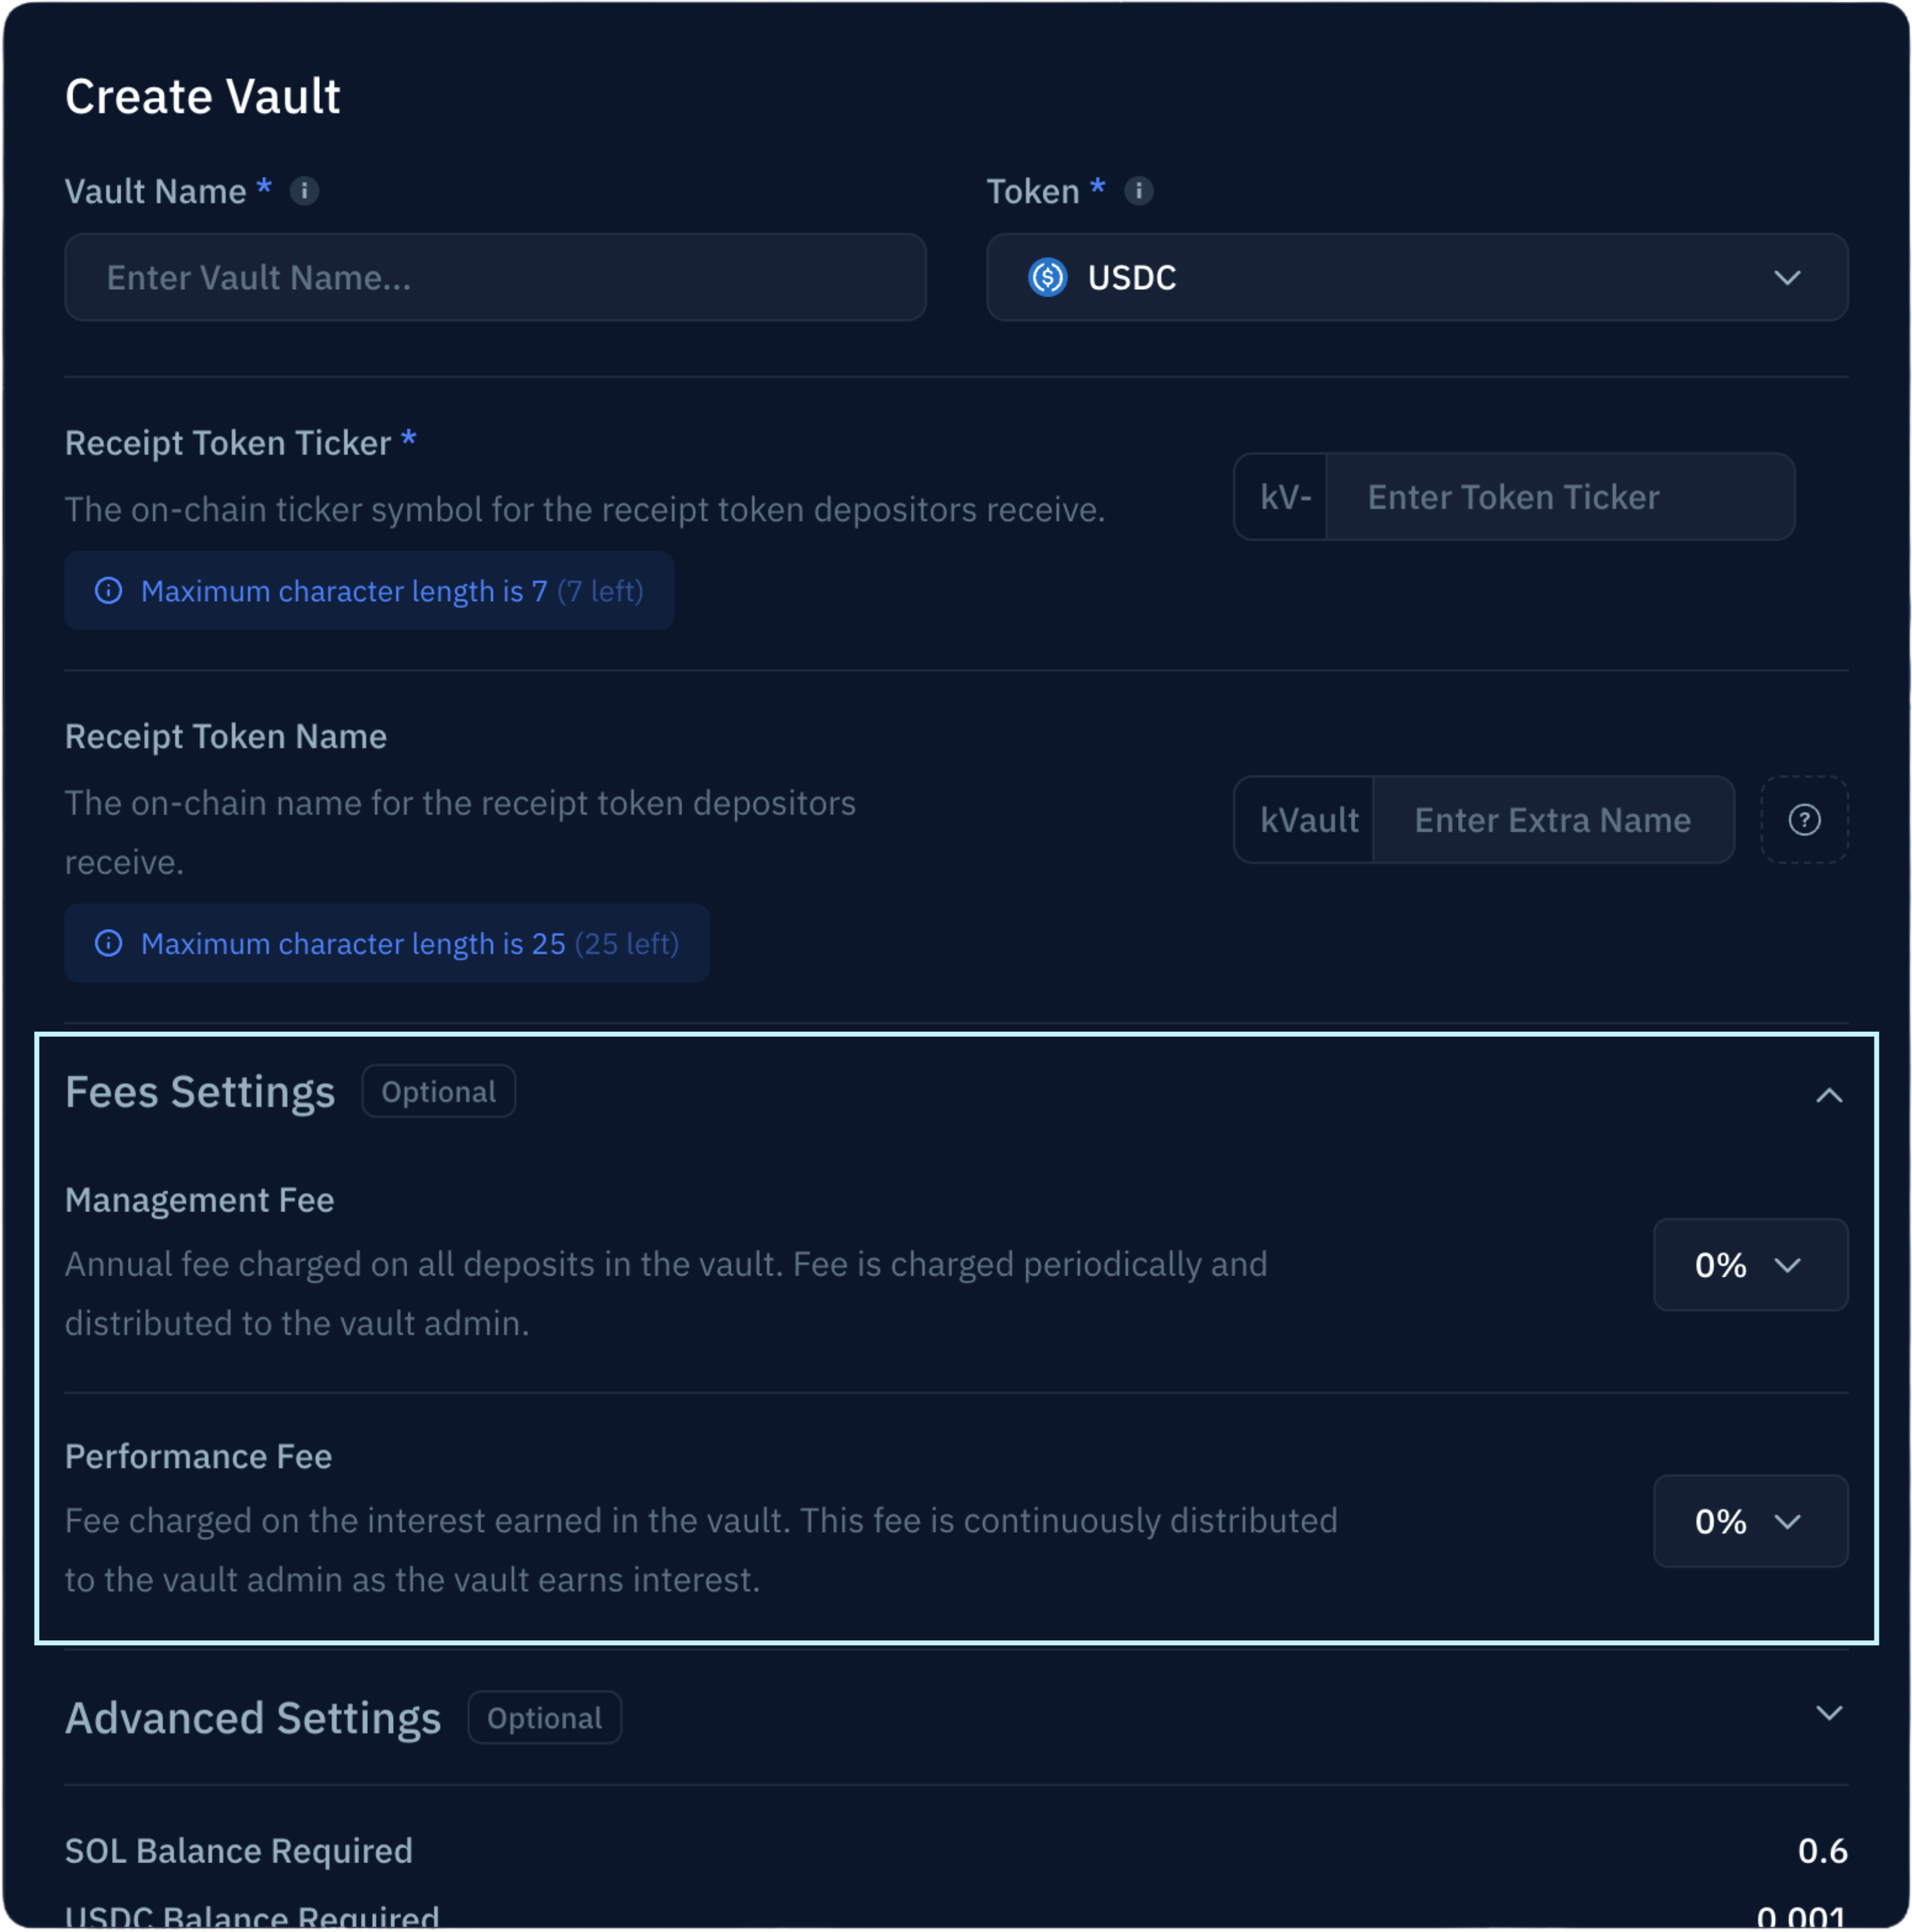
Configure operational parameters (optional)
Set minimum deposit/withdraw/invest amounts, invest delay, withdrawal penalty, and crank fund fee. All are editable post-creation; the defaults are sensible. See the parameter reference for definitions.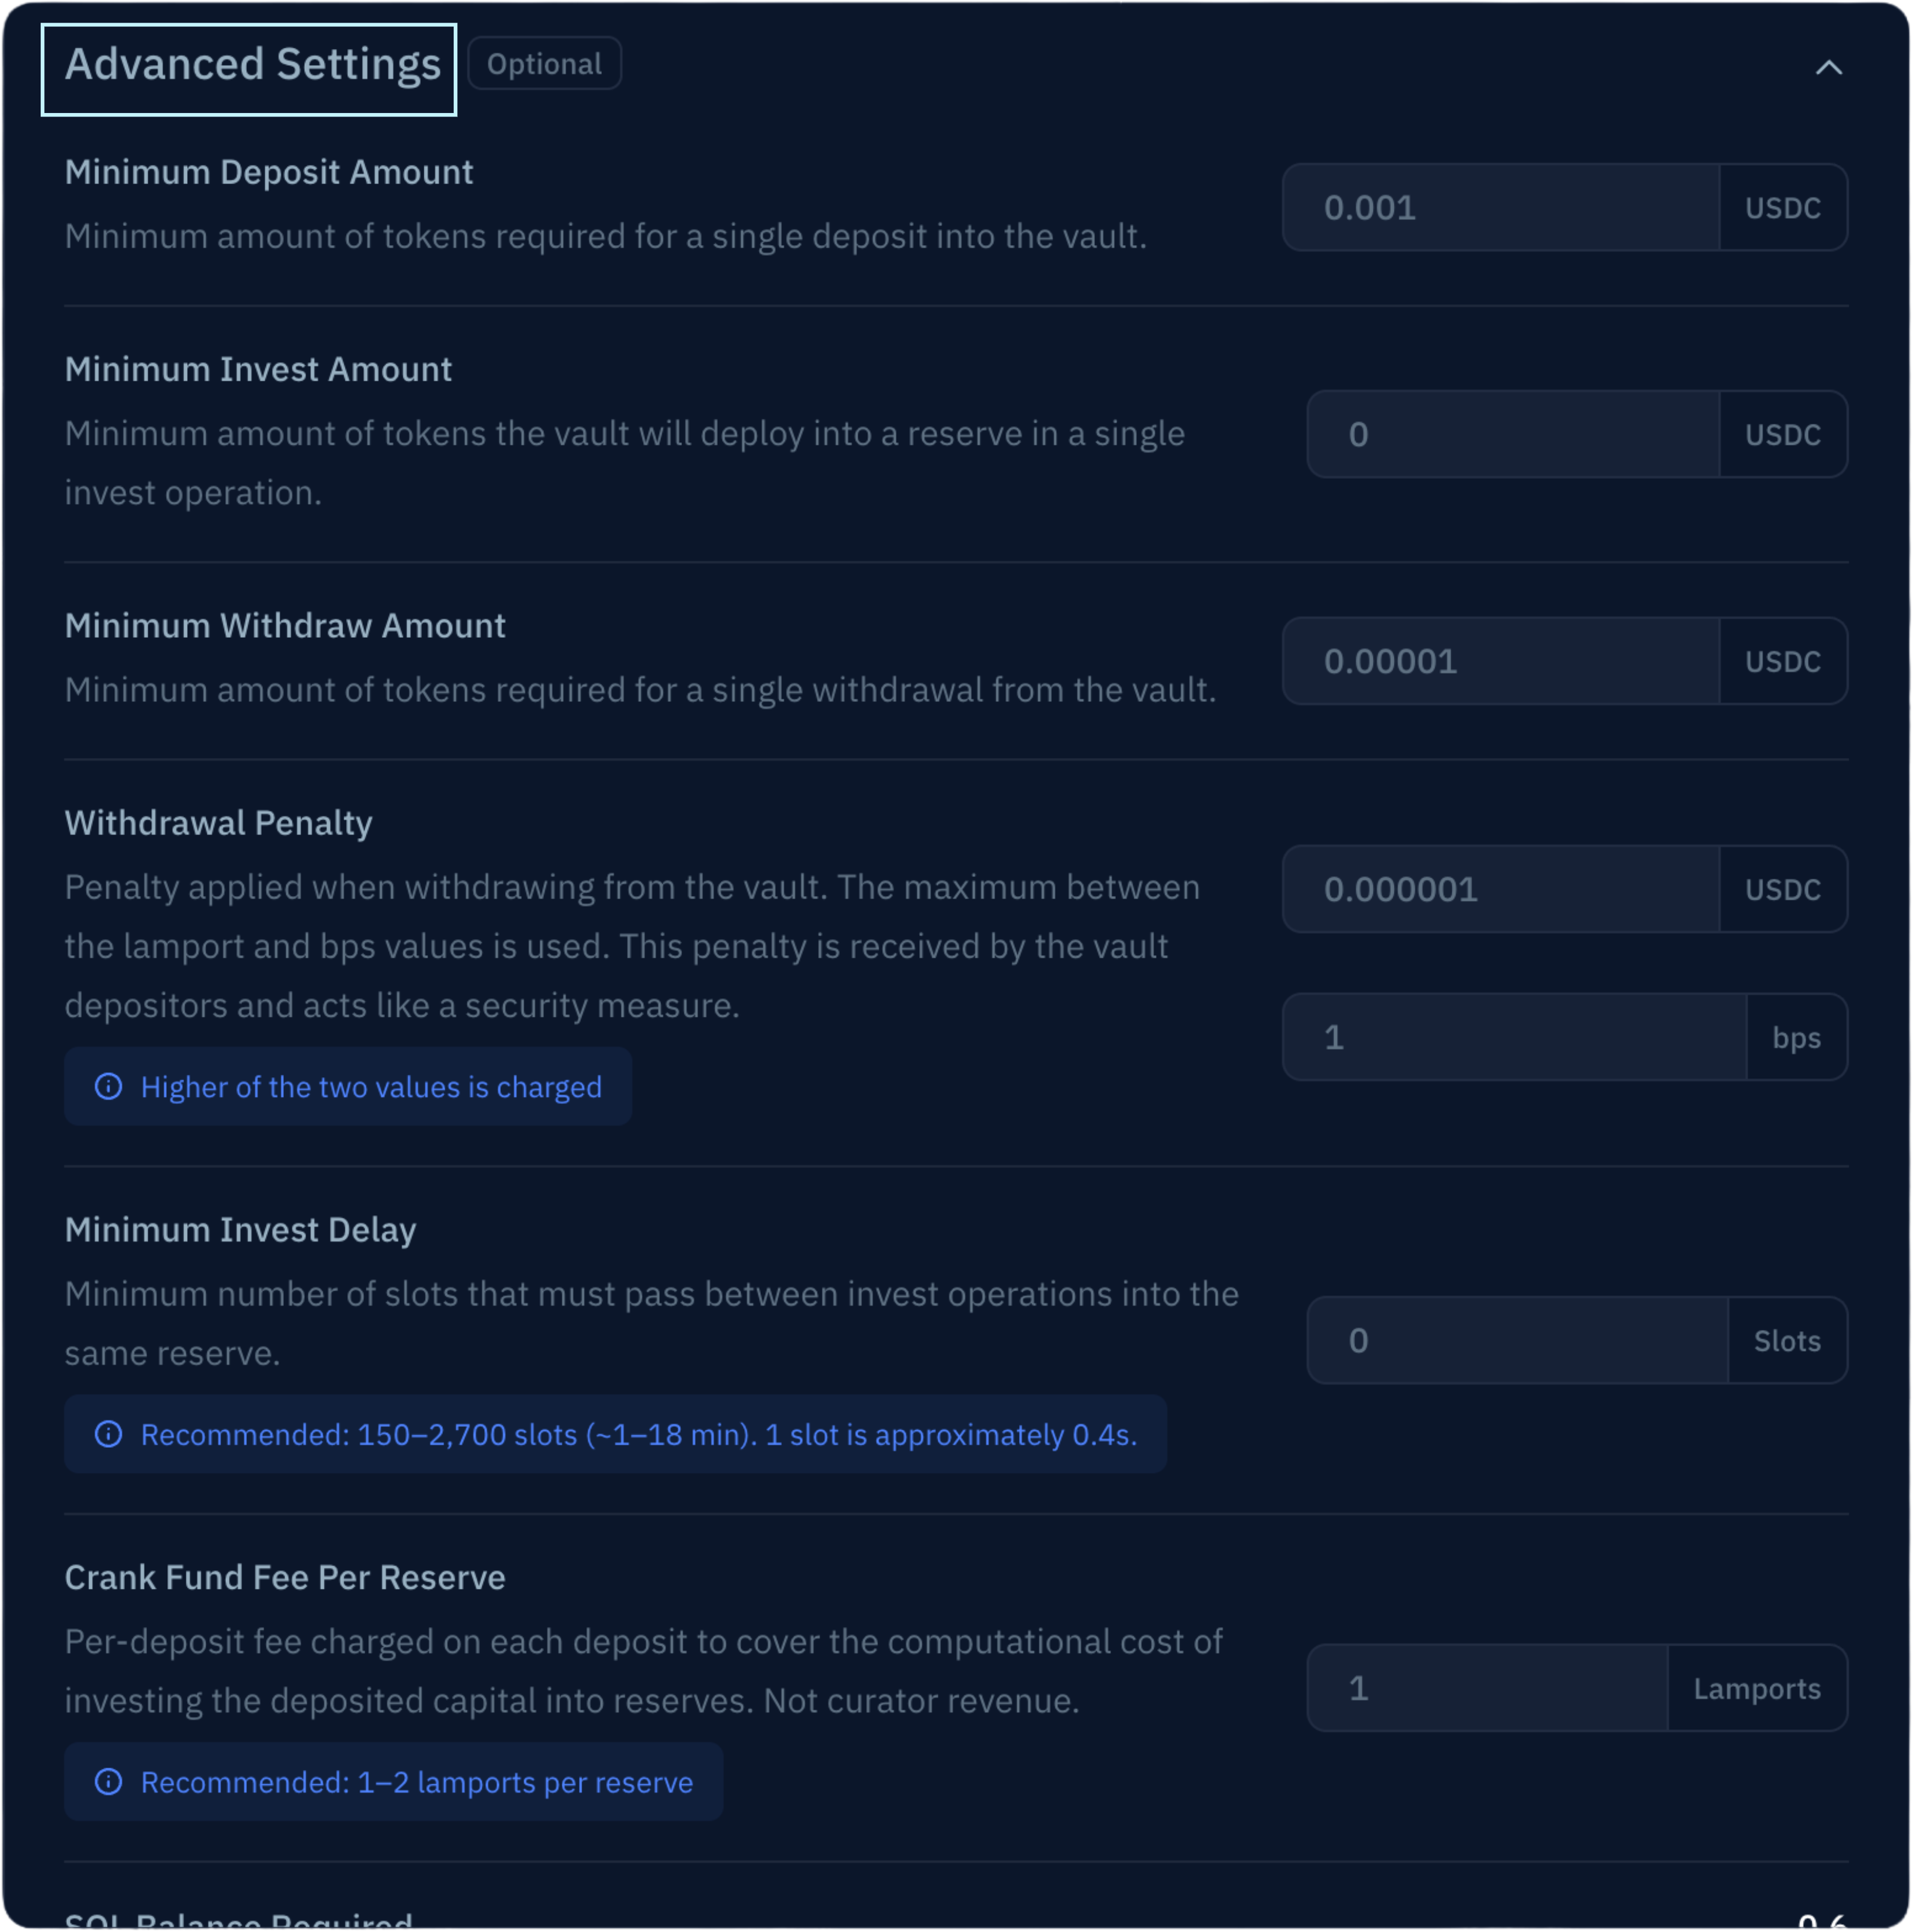
Approved Reserves Only (optional)
The Create New Vault modal includes an Approved Reserves Only toggle. Enabling it activates both Whitelisted Reserves flags as part of the creation transaction — your vault ships with the smart-contract-level allocation restriction in place. This is irreversible. See Concepts → Risk primitives before flipping it. If you don’t enable it here, you can do so later via Enable Whitelisted Reserves.
Submit the creation transaction
Sign with the wallet that holds the bootstrapping deposit. The vault address is displayed after the transaction lands.
Complete post-creation setup
Continue to the post-creation checklist below.
Post-creation checklist
After the vault is created, complete these steps before it’s production-ready. Run them in order.Transfer admin to multisig
Move vault admin to a Squads multisig first, before any subsequent state-changing operations. Once transferred, every operation below flows through Squads as a proposal — which is the production model. See Transfer admin to multisig.
Configure allocations
Without allocations, the vault has nowhere to deploy capital. Add at least one reserve. See Configure allocations.
Configure fixed-rate allocations (if applicable)
If your strategy includes fixed-rate exposure, add allocations into specific FR reserves. See Configure fixed-rate allocations. Skip if your vault is floating-only.
Enable Whitelisted Reserves
Smart-contract-level constraint preventing allocation to unverified reserves. Required for Kamino UI listing. Skip if you already enabled it in the creation flow above. See Enable Whitelisted Reserves.
Set up the Insurance Pool
Lock your skin-in-the-game capital and trigger Kamino’s match (up to $250K). Required for Kamino UI listing. See Set up the Insurance Pool.
Verify farms (only if your create path missed them)
The Vault Farm and Insurance Pool farm are normally created during initialization on the SDK and UI paths. If you used the CLI or otherwise skipped farm creation, see Configure farms.
What’s next
Configure allocations
Set how the vault distributes capital across reserves.
Parameters reference
Complete reference for every vault parameter.