> ## Documentation Index
> Fetch the complete documentation index at: https://kamino.com/docs/llms.txt
> Use this file to discover all available pages before exploring further.
# Create a vault
> Deploy a new Kamino vault — UI walkthrough plus SDK and CLI alternatives, with a complete post-creation checklist
This guide walks through deploying a new vault and completing the post-creation steps that make it production-ready. The conceptual background is in [How vaults work](/curators/vaults/concepts/how-vaults-work); this page is purely operational.
## Before you start
You'll need:
* A funded wallet with at least 1,000 lamports of the deposit token (used as the bootstrapping deposit at creation).
* The mint address of the deposit token (e.g. `EPjFWdd5AufqSSqeM2qN1xzybapC8G4wEGGkZwyTDt1v` for USDC).
* Decisions on: vault name, receipt-token ticker suffix, fee structure, operational parameters.
For SDK or CLI use, also have your admin keypair file path ready.
## Choose your interface
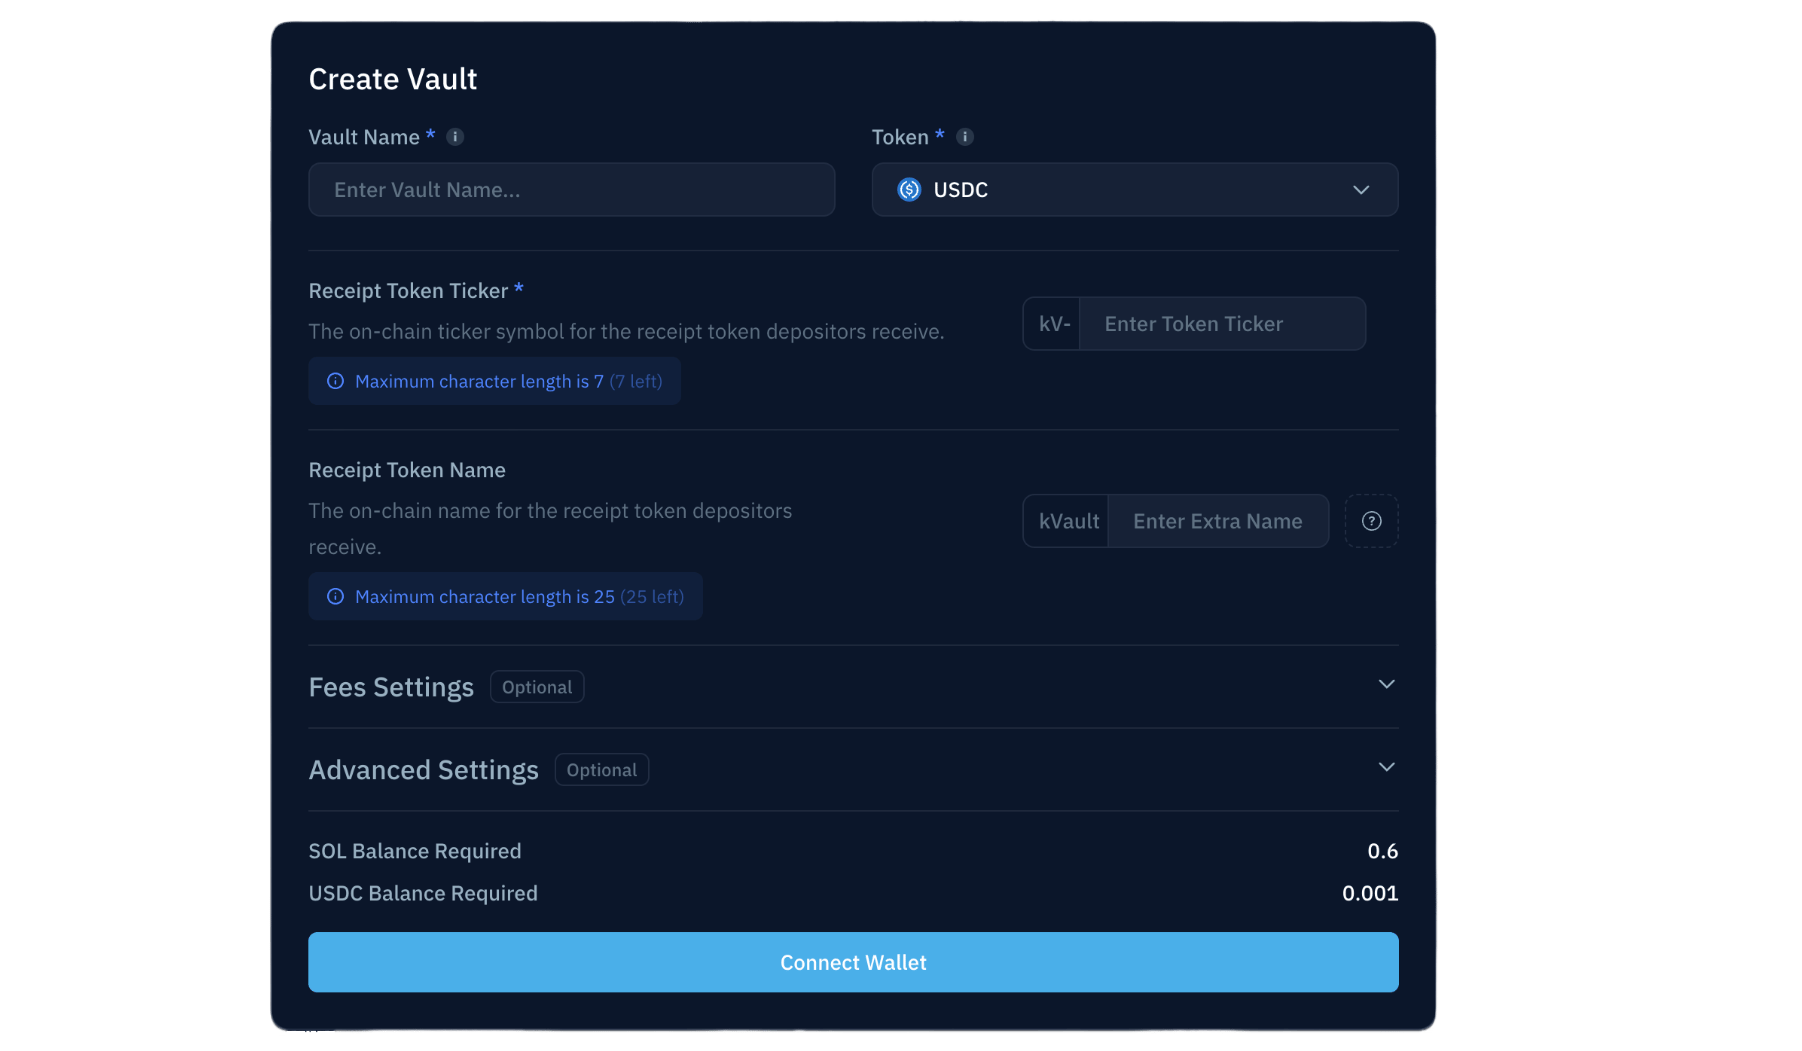
## Create via kamino.com/curators/vaults
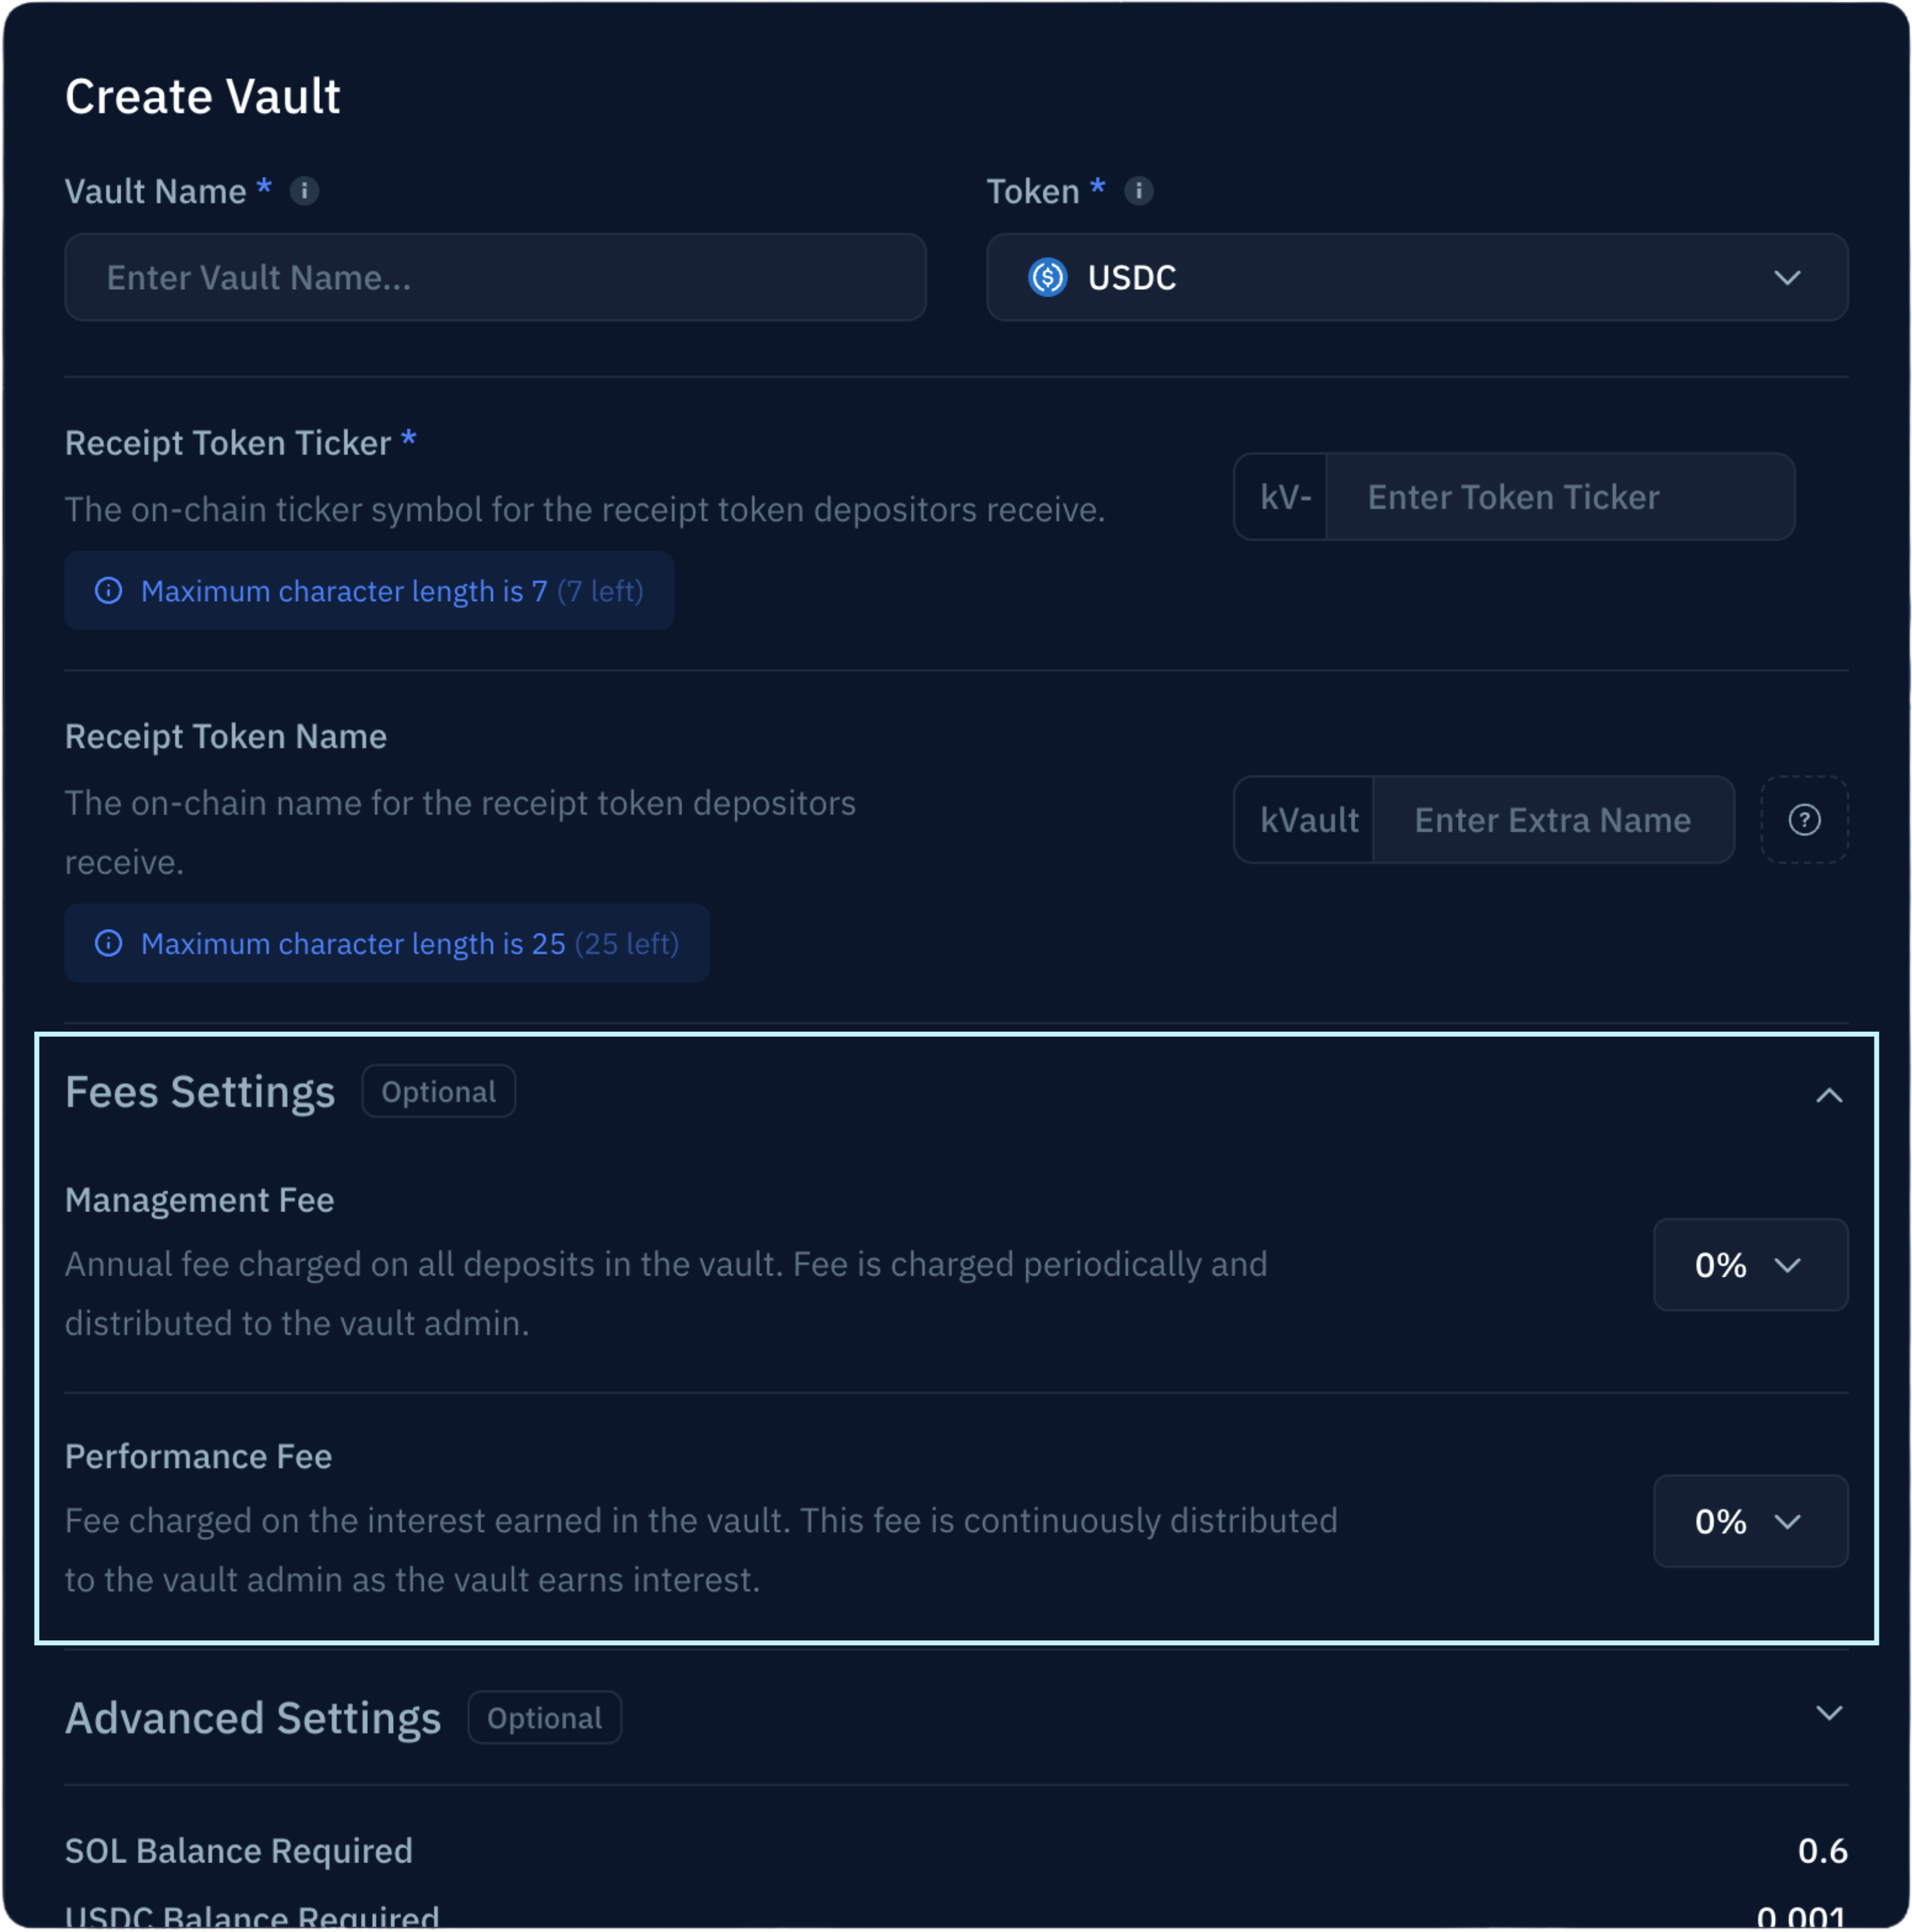
Set the vault name, deposit token, receipt token name and ticker suffix.
| Parameter | Notes |
| -------------------- | ------------------------------------------------------------------------------------------- |
| Vault Name | Max 40 characters; editable post-creation |
| Deposit Token | Immutable; determines available reserves for allocation |
| Receipt Token Ticker | Format `kv[SYMBOL]-[SUFFIX]`; the prefix is immutable, the suffix is editable post-creation |
| Receipt Token Name | Format `kVault [SUFFIX] [NAME]`; max 32 chars total |
Configure performance fee and AUM fee. Both default to 0% and are editable post-creation. See [Yield & fees](/curators/vaults/concepts/yield-and-fees#manager-fees) for the model.
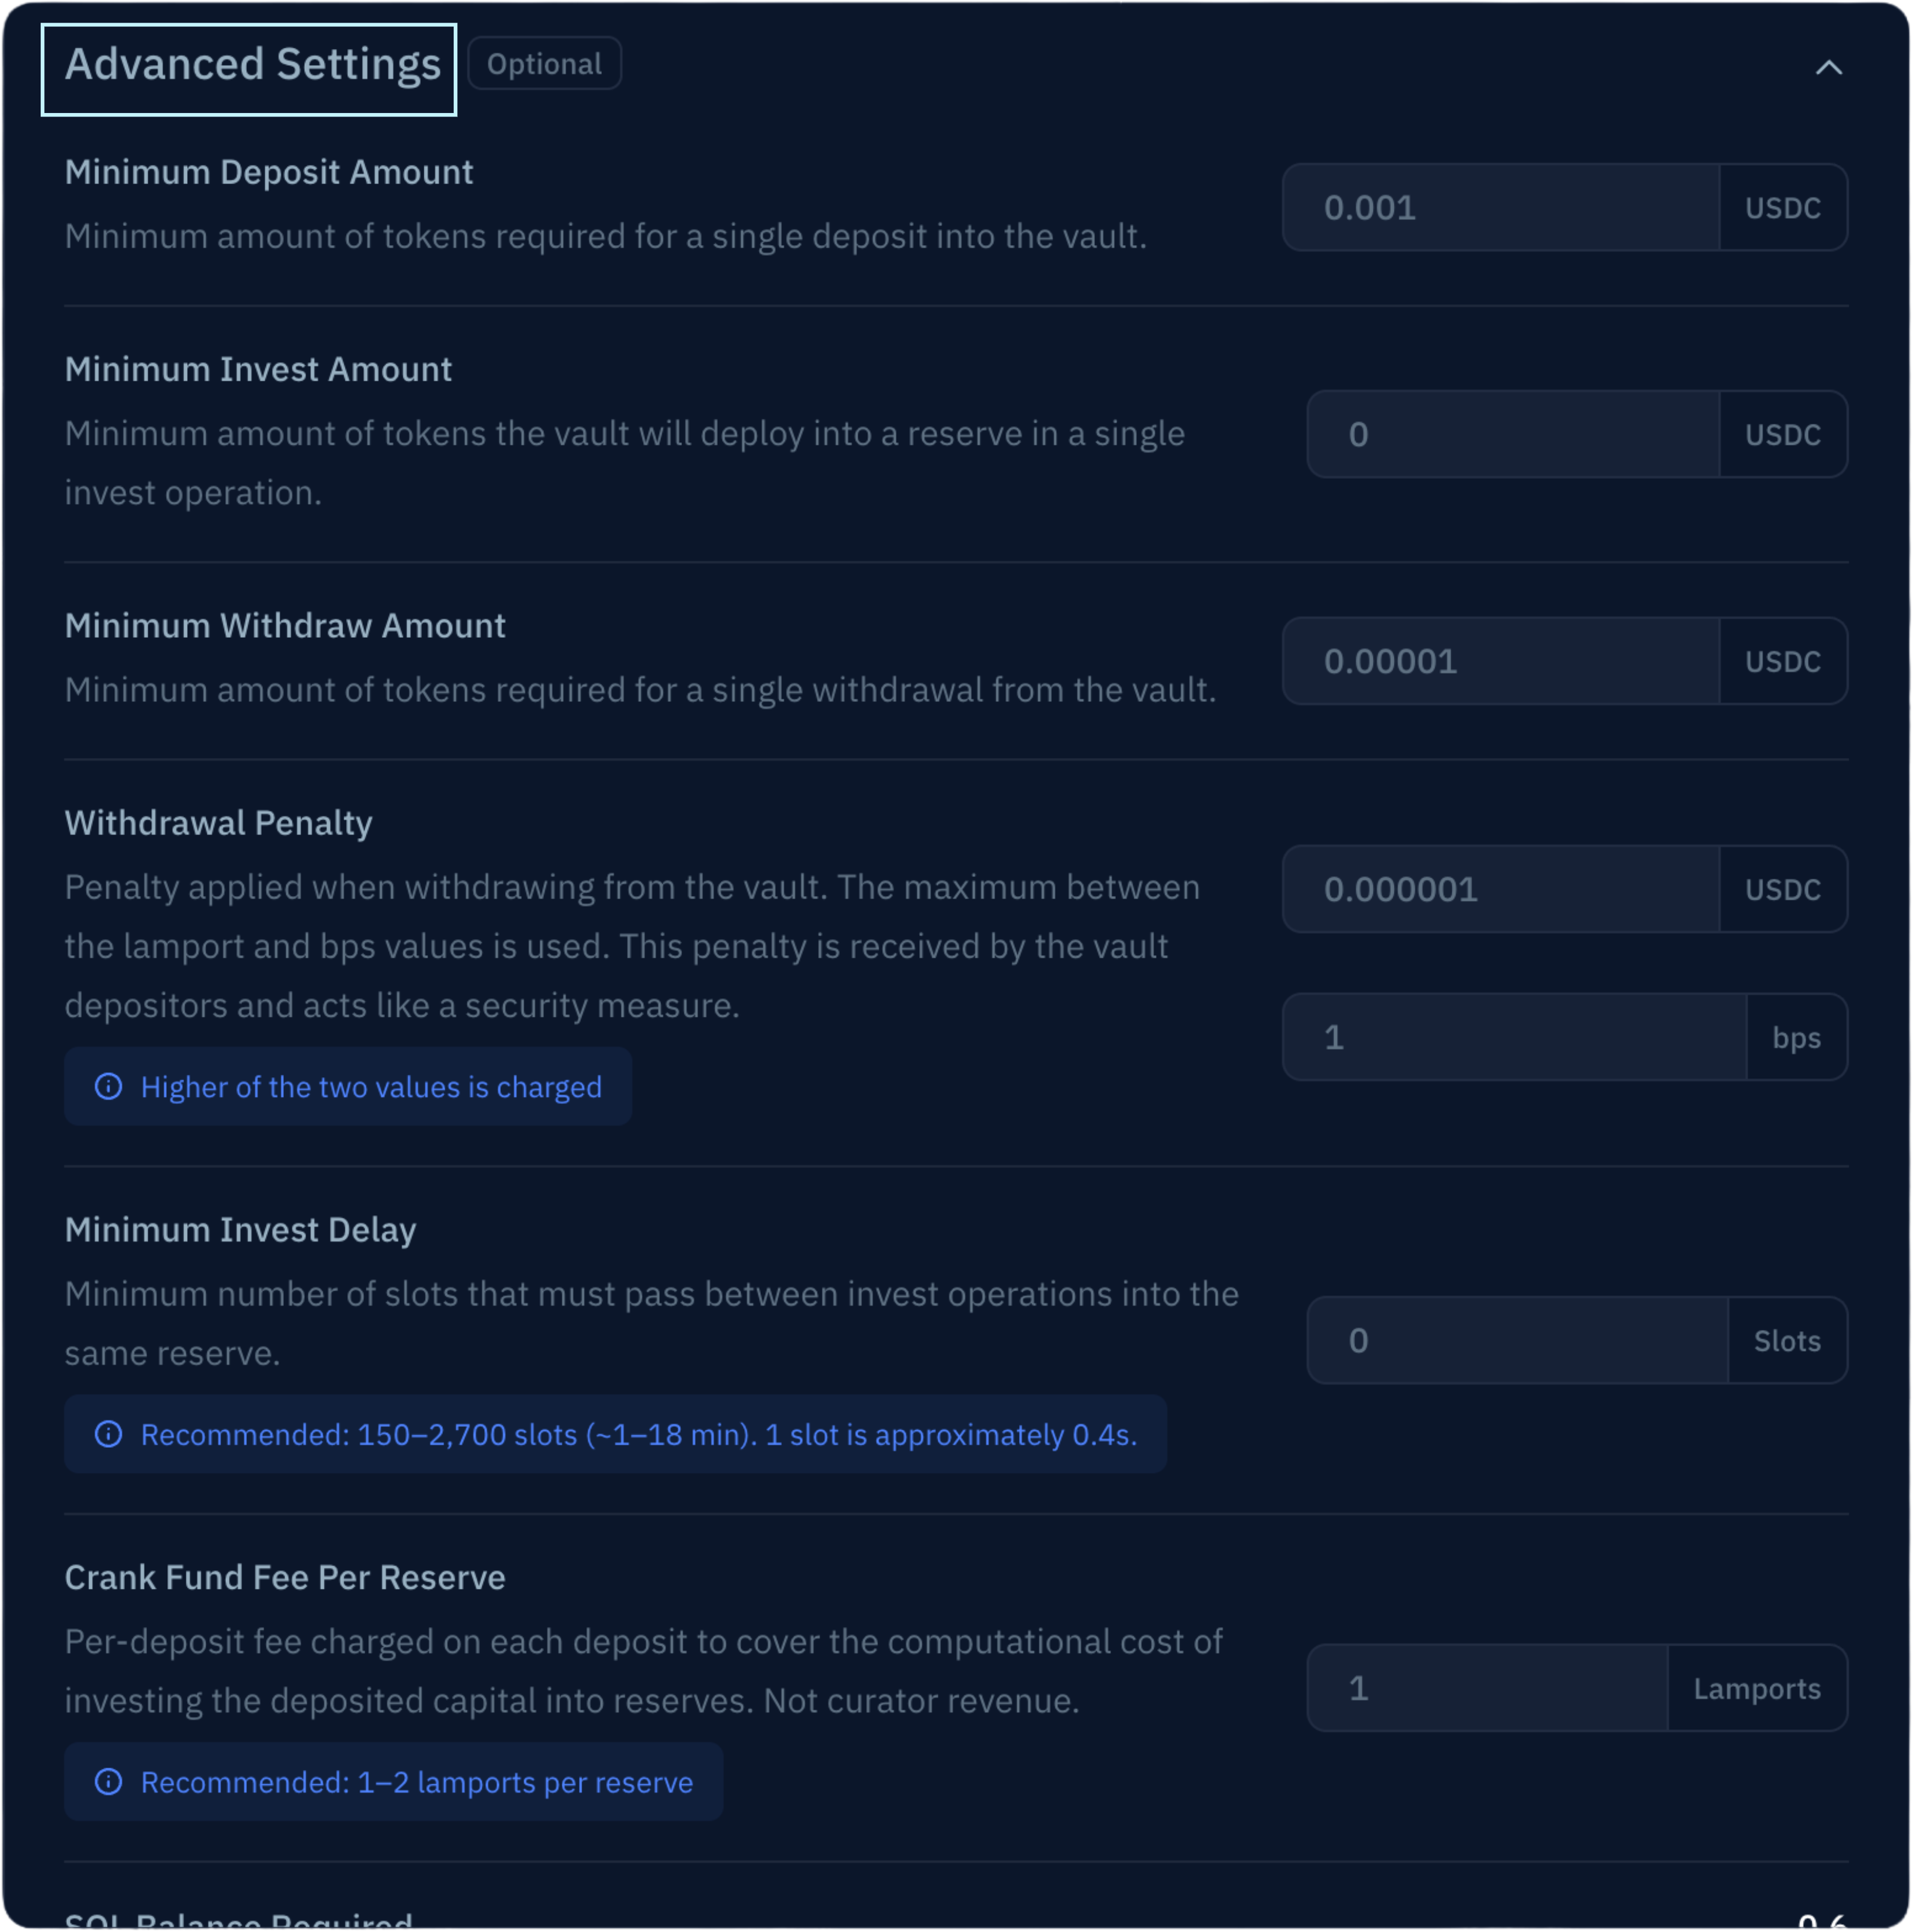
Set minimum deposit/withdraw/invest amounts, invest delay, withdrawal penalty, and crank fund fee. All are editable post-creation; the defaults are sensible. See the [parameter reference](/curators/reference/parameters) for definitions.
The Create New Vault modal includes an **Approved Reserves Only** toggle. Enabling it activates both Whitelisted Reserves flags as part of the creation transaction — your vault ships with the smart-contract-level allocation restriction in place. **This is irreversible.** See [Concepts → Risk primitives](/curators/vaults/concepts/risk-primitives#whitelisted-reserves) before flipping it. If you don't enable it here, you can do so later via [Enable Whitelisted Reserves](/curators/vaults/guides/enable-whitelisted-reserves).
Sign with the wallet that holds the bootstrapping deposit. The vault address is displayed after the transaction lands.
Continue to the [post-creation checklist](#post-creation-checklist) below.
## Create via TypeScript SDK
The full vault creation flow including farm setup runs in three transactions. Use a private RPC endpoint for production — public RPCs are rate-limited.
```typescript theme={null}
import {
createSolanaRpc,
createSolanaRpcSubscriptions,
address,
pipe,
createTransactionMessage,
setTransactionMessageFeePayerSigner,
setTransactionMessageLifetimeUsingBlockhash,
appendTransactionMessageInstructions,
signTransactionMessageWithSigners,
sendAndConfirmTransactionFactory,
} from '@solana/kit';
import {
KaminoManager,
KaminoVaultConfig,
getMedianSlotDurationInMsFromLastEpochs,
} from '@kamino-finance/klend-sdk';
import { parseKeypairFile } from '@kamino-finance/klend-sdk/dist/utils/signer.js';
import { TOKEN_PROGRAM_ADDRESS } from '@solana-program/token';
import { Decimal } from 'decimal.js';
const adminSigner = await parseKeypairFile('/path/to/your/keypair.json');
const rpc = createSolanaRpc('https://api.mainnet-beta.solana.com');
const rpcSubscriptions = createSolanaRpcSubscriptions('wss://api.mainnet-beta.solana.com');
const slotDuration = await getMedianSlotDurationInMsFromLastEpochs();
const kaminoManager = new KaminoManager(rpc, slotDuration);
// 1. Configure the vault
const vaultConfig = new KaminoVaultConfig({
admin: adminSigner,
tokenMint: address('EPjFWdd5AufqSSqeM2qN1xzybapC8G4wEGGkZwyTDt1v'), // USDC
tokenMintProgramId: TOKEN_PROGRAM_ADDRESS,
performanceFeeRatePercentage: new Decimal(15.0),
managementFeeRatePercentage: new Decimal(2.0),
name: 'MyVault',
vaultTokenSymbol: 'USDC',
vaultTokenName: 'MyVaultToken',
// Operational params — defaults shown
minDepositAmount: 1000,
minWithdrawAmount: 10,
withdrawalPenaltyBps: 1,
withdrawalPenaltyLamports: 1,
crankFundFeePerReserve: 1,
});
// 2. Generate creation instructions
const { vault: vaultSigner, initVaultIxs: instructions } =
await kaminoManager.createVaultIxs(vaultConfig);
// 3. Helper to build, sign, and send a transaction
async function send(ixs) {
const { value: blockhash } = await rpc.getLatestBlockhash({ commitment: 'finalized' }).send();
const signed = await signTransactionMessageWithSigners(
pipe(
createTransactionMessage({ version: 0 }),
tx => setTransactionMessageFeePayerSigner(adminSigner, tx),
tx => setTransactionMessageLifetimeUsingBlockhash(blockhash, tx),
tx => appendTransactionMessageInstructions(ixs, tx),
),
);
await sendAndConfirmTransactionFactory({ rpc, rpcSubscriptions })(signed, {
commitment: 'confirmed',
skipPreflight: true,
});
}
// 4. Tx 1 — create the vault and register farms
await send([
...instructions.createAtaIfNeededIxs,
...instructions.initVaultIxs,
instructions.createLUTIx,
instructions.initSharesMetadataIx,
...instructions.setFarmToVaultIxs,
]);
console.log('Vault created:', vaultSigner.address);
// 4b. (Optional) Enable Whitelisted Reserves as part of the create flow.
// This is irreversible — see Concepts → Risk primitives before doing it.
//
// const allocIx = await kaminoManager.updateVaultAllowAllocationsInWhitelistedReservesOnlyIxs(
// new KaminoVault(rpc, vaultSigner.address),
// true,
// );
// const investIx = await kaminoManager.updateVaultAllowInvestInWhitelistedReservesOnlyIxs(
// new KaminoVault(rpc, vaultSigner.address),
// true,
// );
// await send([allocIx, investIx]);
// 5. Tx 2 — create and configure farms (Vault Farm + Insurance Pool farm)
for (const farm of instructions.createVaultFarms) {
await send(farm.setupFarmIxs);
await send(farm.updateFarmIxs);
}
// 6. Tx 3 — populate the lookup table (optional, optimizes future tx sizes)
await new Promise(r => setTimeout(r, 2000)); // wait for state to settle
await send(instructions.populateLUTIxs);
```
**What `createVaultIxs` produces:**
* `initVaultIxs` — vault account creation + initial config
* `createLUTIx` + `initSharesMetadataIx` — lookup table and receipt-token metadata
* `setFarmToVaultIxs` — registers the Vault Farm and Insurance Pool farm addresses on the vault
* `createVaultFarms` — array of farm setup instructions, run sequentially
* `populateLUTIxs` — populates the lookup table
The Autocompound Farm is configurable post-creation via the UI; SDK support is on the way.
Continue to the [post-creation checklist](#post-creation-checklist).
## Create via Kamino CLI
Complete the [CLI installation guide](/build/cli/installation-setup) first. Commands require a `.env` file with `ADMIN` (path to vault owner keypair) and `RPC` configured.
The CLI's `create-vault` command creates a vault with default settings. Use the SDK or UI for advanced configuration during creation.
```bash theme={null}
yarn kamino-manager create-vault \
--mint \
--mode execute
```
Replace `` with the deposit token mint (e.g. `EPjFWdd5AufqSSqeM2qN1xzybapC8G4wEGGkZwyTDt1v` for USDC). Save the vault address from the output — you'll need it for every subsequent command.
For testing, add `--staging` to use the staging program ID. Never use `--staging` against mainnet vaults.
**Whitelisted Reserves cannot be enabled via the CLI's `create-vault` command.** If you want this protection (recommended for production), enable it as a post-creation step using the SDK or UI — see [Enable Whitelisted Reserves](/curators/vaults/guides/enable-whitelisted-reserves).
Continue to the [post-creation checklist](#post-creation-checklist).
## Post-creation checklist
After the vault is created, complete these steps before it's production-ready. Run them in order.
Move vault admin to a Squads multisig **first**, before any subsequent state-changing operations. Once transferred, every operation below flows through Squads as a proposal — which is the production model. See [Transfer admin to multisig](/curators/vaults/guides/transfer-admin).
Without allocations, the vault has nowhere to deploy capital. Add at least one reserve. See [Configure allocations](/curators/vaults/guides/configure-allocations).
If your strategy includes fixed-rate exposure, add allocations into specific FR reserves. See [Configure fixed-rate allocations](/curators/vaults/guides/configure-fixed-rate-allocations). Skip if your vault is floating-only.
Smart-contract-level constraint preventing allocation to unverified reserves. Required for Kamino UI listing. Skip if you already enabled it in the creation flow above. See [Enable Whitelisted Reserves](/curators/vaults/guides/enable-whitelisted-reserves).
Lock your skin-in-the-game capital and trigger Kamino's match (up to \$250K). Required for Kamino UI listing. See [Set up the Insurance Pool](/curators/vaults/guides/set-up-insurance-pool).
The Vault Farm and Insurance Pool farm are normally created during initialization on the SDK and UI paths. If you used the CLI or otherwise skipped farm creation, see [Configure farms](/curators/vaults/guides/configure-farms).
## What's next
Set how the vault distributes capital across reserves.
Complete reference for every vault parameter.
 | Parameter | Notes |
| -------------------- | ------------------------------------------------------------------------------------------- |
| Vault Name | Max 40 characters; editable post-creation |
| Deposit Token | Immutable; determines available reserves for allocation |
| Receipt Token Ticker | Format `kv[SYMBOL]-[SUFFIX]`; the prefix is immutable, the suffix is editable post-creation |
| Receipt Token Name | Format `kVault [SUFFIX] [NAME]`; max 32 chars total |
| Parameter | Notes |
| -------------------- | ------------------------------------------------------------------------------------------- |
| Vault Name | Max 40 characters; editable post-creation |
| Deposit Token | Immutable; determines available reserves for allocation |
| Receipt Token Ticker | Format `kv[SYMBOL]-[SUFFIX]`; the prefix is immutable, the suffix is editable post-creation |
| Receipt Token Name | Format `kVault [SUFFIX] [NAME]`; max 32 chars total |